HIGHLIGHTER & CONTOUR MAKEUP

Time to shine! Whether subtle or sparkly, powdered or jellied, everyone looks better with a little incandescent movie-star light on their skin. And since most of us don't get to be lit by cinematographers on the regular, the makeup gods created highlighter.

Highlighting and contouring are opposite techniques. Highlighting focuses on the high points of your face and uses makeup that reflects light to enhance your complexion and give your face a brighter glow. Contouring uses makeup shades that are slightly lighter or darker than your skin tone to shadow, define, and give shape to a specific area of your face and your facial structure. The best contour makeup is one that blends into your skin seamlessly while highlighting and darkening skin where you need it. All Maybelline makeup artists swear by Instant Age Rewind Concealer for this ability. You'll have to choose one concealer that's at least two shades lighter than your natural skin tone to highlight and one two shades darker than your natural skin tone to contour and use them in conjunction. Gently define the nose by drawing a line of contour on both sides, going all the way from the top of the bridge, close to the brow, down the tip. Gently pat in color with a makeup sponge. Highlighter makeup is pale, shimmery powder or cream makeup that's meant to mimic the effects of really good lighting on skin. It makes cheekbones pop, eyes shine and skin glimmer. It's not an essential part of your look like, say, concealer or mascara, but much like a bit of eye-catching jewelry, it's a fun, flattering addition to your look. Traditionally, highlighter is a powder, but the rise of new, easy-to use gel formulas have made it as easy as finger paint to apply and the effect as natural or spotlight stealing as you want it. Liquid highlighter is simply a highlighter in a liquid or jelly format that can be applied using your fingers, a makeup sponge or brush. It's definitely a more subtle, buildable alternative to powder highlighter. Applying jelly highlighter gives you control for more precise highlighting for down the center of the nose or dabbing on your cupid's bow, whereas powder can be used to create gorgeous all-over dewiness on cheeks and temples.

Radiant, glowy skin is definitely in, but there are a few guidelines you should pay attention to when wearing shimmery highlighters.


DO use highlighter in spots that catch light, and enhance your natural features: on cheekbones and temples, down the bridge of your nose, under brows, the inner corners of eyes, and above the cupid's bow.


DO keep your other makeup like foundation, blush and bronzer softly matte and shimmer free.


DO blend out highlighter with your fingers, a fan brush, or a damp makeup sponge after you've applied it. To avoid blobs of product and obvious makeup lines, make sure you blend any harsh edges of highlighter so it fades into the rest of your skin.


DON'T dust or blend highlighter all over your face. This is more E.T. than chic.

Our Master Chrome Highlighter comes in two easy-to-use forms, jelly and powder. Both create sheer, shimmery effects on skin. Our Master Chrome Metallic Highligher is an Allure Best of Beauty award winner! Contouring is using deeper and lighter shades of concealer or another face makeup product to sculpt, highlight and enhance your natural bone structure. You can be simple, or complicated with it. The key to good contouring is blending it very well so that there are no noticeable lines of demarcation. Contour palettes, like Maybelline's Master Contour Face Contouring Kit, typically features bronzer, blush, and highlighter shades and an angled contour brush. The blendable and buildable shades allow you to customize your look. Maybelline's version of it is suitable for any skill level thanks to our foolproof contouring education included inside of the kit. Just three quick steps - contour, blush & highlight - all achievable with one easy-to-use palette.

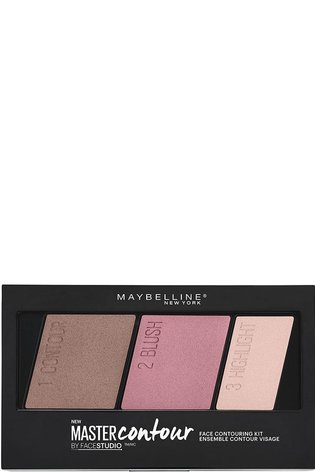
We all hear so much about the sculpting, enhancing, all-around transformative magic of contouring. Here's how to do it:


Step 1: Apply foundation all over your face to create a natural looking but seamless "canvas" for the contour.


Step 2: Start with the darker concealer shade at the top of your cheekbone and draw a line right to the apple of your cheek. Tip: Always apply your darker contour shade first and your highlighter/concealer shade second. It will give a more "lifted" and awake effect.


Step 3: Using that same concealer shade, draw a line along the jawline, starting from the top of your ear.


Step 4: Add depth and dimension to the forehead by outlining the forehead along the hairline, and connecting that line to the cheekbone. For an extra bronzed look, add a bit more color to the temples.


Step 5: Blend all of the contour lines into your skin with a beauty blender, making sure you PAT in color, as opposed to swiping it, to keep that opacity!


Step 6: Gently define the nose by drawing a line of contour on both sides, going all the way from the top of the bridge, close to the brow, down the tip. Gently pat in color with a beauty blender.


Step 7: Now use a lighter concealer shade to conceal dark circles and brighten the face. Add "lift" by drawing slightly upward tilted lines at the ends of the eyes, in between brows, down the bridge of the nose, and along the mid cheek. Add a pop of brightness on the outer corners of the nose, and a dot on the center chin. Then, blend!